Did you know over 70% of Americans now love cute Halloween decorations more than scary ones? Our guide is here to change your Halloween with fun and creative pumpkins. Say goodbye to scary designs and hello to joy!
We’re exploring cute pumpkin ideas that will make everyone smile. No more scary jack-o’-lanterns this year. Instead, we’re going for designs that are charming, perfect for photos, and fun for all ages.
Our collection includes adorable animal faces and fun emoji designs. These pumpkins show that Halloween can be both fun and warm. Whether you’re experienced or new to carving, these ideas will spark your creativity.
Get ready to turn simple pumpkins into amazing art pieces. They’ll be the highlight of your neighborhood. Let’s make this Halloween the most adorable one yet!
🎃 Why Cute Pumpkin Carving Is the New Halloween Trend
Halloween has changed for the better. No more scary decorations. Now, fun halloween pumpkins are the stars, bringing happiness and creativity to family gatherings.
The way we decorate for Halloween shows a big change. Families are choosing family-friendly pumpkin art that everyone can enjoy. This makes Halloween a time for fun and creativity, not just scary stuff.
The Charm Behind Cute Pumpkin Designs
So, what makes a pumpkin design cute? It’s all about psychology:
- Rounded, soft shapes that make us want to care for them
- Expressive faces with big eyes and smiles
- Playful characters that make us think creatively
Why Cute Pumpkins Work for Families
Cute pumpkin designs are great for families:
| Benefit | Impact |
|---|---|
| Inclusivity | Welcomes all ages to join in |
| Creativity | Encourages everyone to be creative |
| Emotional Connection | Helps create happy Halloween memories |
Our Halloween celebrations are evolving. Cute pumpkins are more than decorations—they’re symbols of joy, creativity, and family bonding.
🧡 How to Prepare Your Pumpkin Like a Pro
Pumpkin carving for beginners might seem tough, but it’s easy with the right steps. We’ll guide you through each step to make your Halloween pumpkin a hit. You’ll learn how to carve with ease and creativity.
Selecting the Perfect Pumpkin
For simple pumpkin designs, look for these traits:
- Smooth, even surface for easy sketching
- Firm exterior without soft spots
- Shape that matches your planned design
- Sturdy stem and balanced bottom
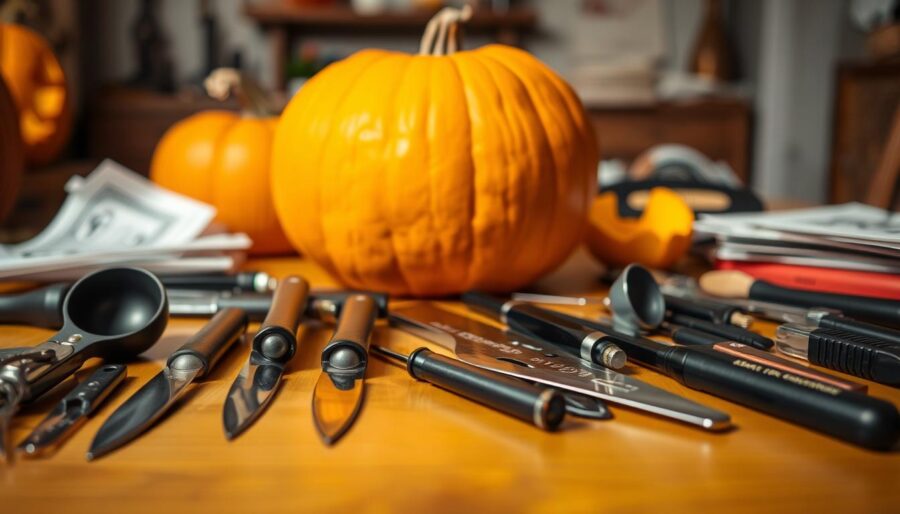
Essential Carving Tools for Success
You’ll need these basic tools for easy pumpkin carving:
- Sharp serrated knife
- Pumpkin scraper or large spoon
- Washable chalk marker
- Small detail carving tools
- Protective gloves
Preparation Steps
Here are the key steps to prepare your pumpkin:
- Clean the exterior with a damp cloth
- Cut an opening at the bottom for easier cleaning
- Scoop out seeds and stringy pulp
- Scrape interior walls until 1-inch thick
- Dry interior completely
- Sketch your design using chalk marker
Pro tip: Refrigerate your pumpkin when not displaying to extend its lifespan and keep it looking fresh for your Halloween celebration!
✨ Top 10 Cutest Pumpkin Carving Ideas You’ll Fall in Love With
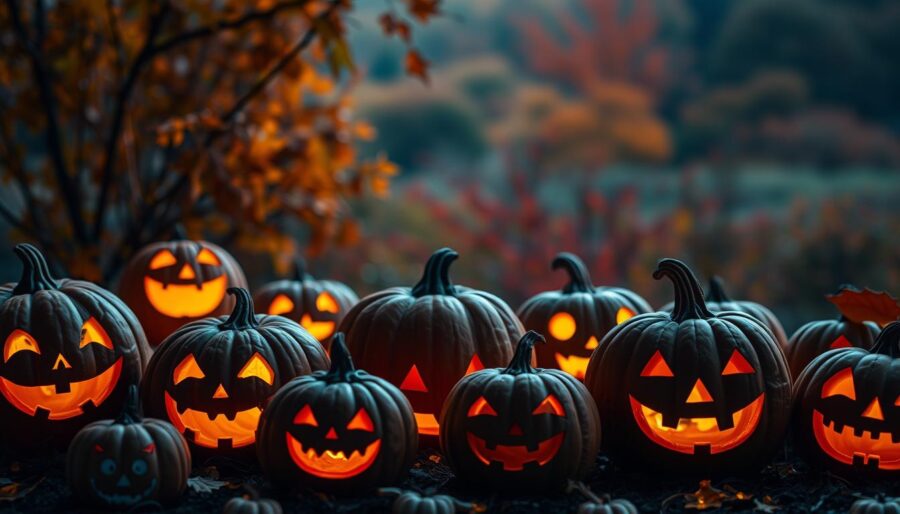
Get ready to turn your Halloween pumpkins from spooky to spectacular! We’ve picked the most adorable and creative designs for you. These unique pumpkin faces are great for families and anyone wanting to add charm to their decor.
Our top 10 list is all about cuteness and creating fun Halloween moments. Each design is chosen to fit different skill levels and interests. So, there’s something for everyone.
- Perfect for all ages
- Skill levels from beginner to advanced
- Social media-worthy designs
- Family-friendly inspiration
Whether you’re new to pumpkin carving or a pro, our designs will inspire you. From cute animal faces to whimsical characters, Halloween can be both cute and creative.
| Difficulty Level | Design Type | Skill Required |
|---|---|---|
| Easy | Emoji Faces | Beginner |
| Medium | Character Designs | Intermediate |
| Advanced | Detailed Scenes | Expert |
Get ready to dive into the most adorable pumpkin carving adventure of your life! Each design is made to bring smiles and ease. Let’s explore these magical Halloween pumpkin transformations that will make your home the talk of the neighborhood.
1. Smiling Kitty Pumpkin — purr-fect for pet lovers
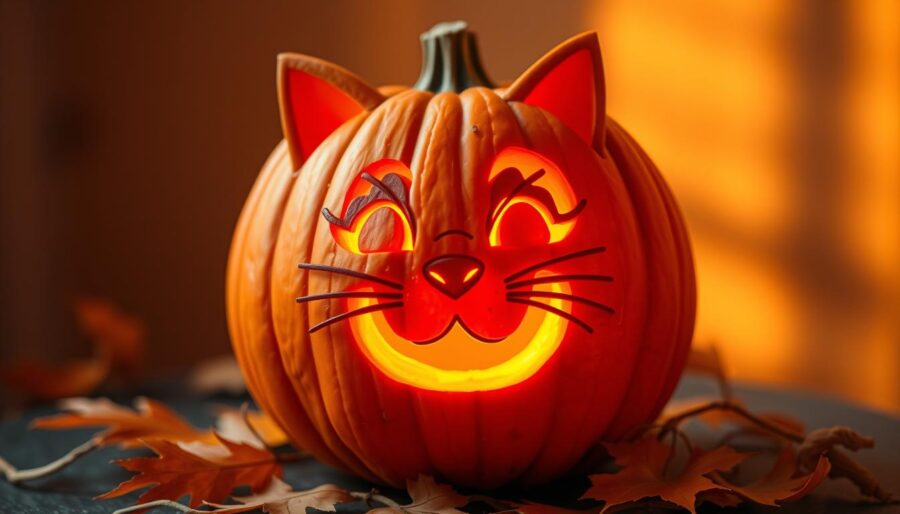
Cat lovers, get ready to turn your Halloween pumpkin into a cute kitty masterpiece! Our guide will show you how to make a smiling kitty design. It will melt hearts and capture the playful spirit of your favorite furry friend.
Cat pumpkin carving is simpler than you think. We’ll guide you through a simple yet charming cat pumpkin template. It highlights the cutest feline features with geometric shapes that form an irresistible cat face.
- Two triangle ears at the top
- Diamond-shaped or circular eyes
- Small triangular nose
- Whisker lines extending from the cheeks
For those wanting to make their cat pumpkin templates even more special, consider these creative variations:
- Full Face View: Create a symmetrical kitty face with wide, curious eyes
- Side Profile: Carve a sitting cat silhouette for a more artistic approach
- Playful Pose: Add a bow or collar to enhance the cuteness factor
Pro tip: Use thin, precise carving tools to achieve delicate features that truly capture your cat’s personality. Whether you’re a seasoned pumpkin artist or a Halloween novice, this smiling kitty design promises to be the highlight of your seasonal decorations!
2. Heart-Eyed Emoji Pumpkin — spread happiness, not horror

Looking for easy pumpkin faces that capture pure joy? The heart-eyed emoji pumpkin is your perfect Halloween design! This adorable carving turns an ordinary pumpkin into a social media-worthy masterpiece that spreads instant happiness.
Creating funny pumpkin faces doesn’t get easier than this emoji design. We’ll guide you through crafting the ultimate heart-eyed masterpiece. It’s both simple and spectacular. The best part? This design is perfect for crafters of all skill levels!
- Perfect for teens and social media enthusiasts
- Requires minimal carving skills
- Guaranteed to make viewers smile
To create your simple pumpkin faces with emoji charm, you’ll need a few basic tools:
- Sharp pumpkin carving knife
- Marker for sketching
- Stencil (optional)
- Small scoop for cleaning
The key to this design is symmetry. Carefully sketch two heart-shaped eyes that tilt slightly inward, mimicking the classic emoji expression. Don’t stress about perfection — slight imperfections add character! Pair the hearts with a wide, cheerful smile that stretches across the pumpkin’s surface.
Pro tip: Want extra cuteness? Add a soft blush effect using pink paint or markers on the cheeks. This little touch transforms your pumpkin from cute to absolutely irresistible!
3. Mini Mouse Pumpkin — Disney-inspired charm
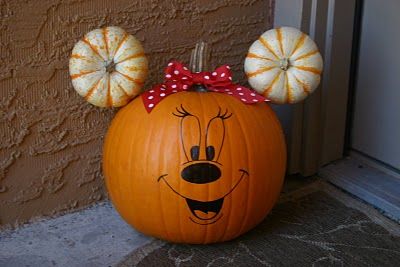
Make your Halloween decor magical with a Minnie Mouse pumpkin. Our Disney pumpkin patterns are perfect for family-friendly jack-o-lanterns. They will make Disney fans of all ages happy.
Making a Minnie Mouse pumpkin is simple. We’ll show you how to create a Disney-inspired jack-o-lantern that looks just like Minnie. Focus on her bow, ears, and sweet face.
- Choose a round, smooth pumpkin for the best canvas
- Use Disney pumpkin stencils for precise cutting
- Carefully outline Minnie’s distinctive features
- Add a fabric bow for extra Disney magic
Pro tip: Use tape and a transfer tool for precise outlines with Disney pumpkin stencils. For extra sparkle, add glitter or paint to your Minnie Mouse pumpkin!
| Design Element | Carving Difficulty | Cuteness Factor |
|---|---|---|
| Minnie’s Ears | Easy | 10/10 |
| Bow Details | Medium | 9/10 |
| Facial Features | Moderate | 8/10 |
Our Disney-inspired pumpkin design makes a simple jack-o-lantern into a magical memory. Kids will love it, and adults will enjoy the nostalgic charm of Minnie Mouse.
4. Starry Night Pumpkin — twinkling holes for dreamy light
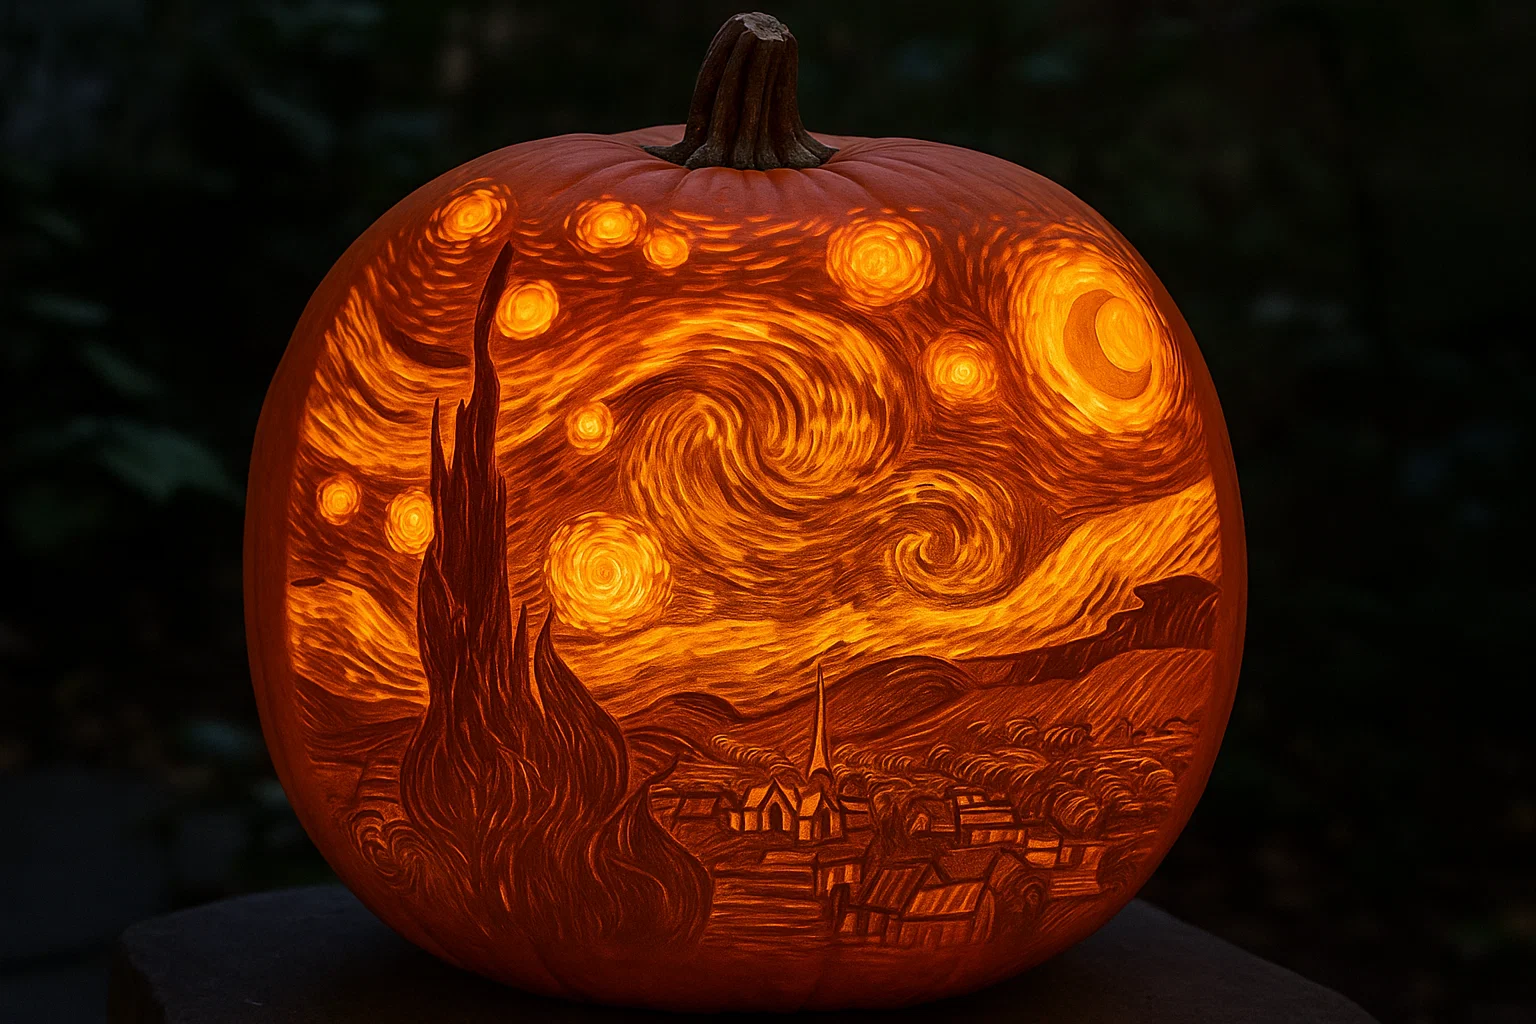
Turn your Halloween pumpkin into a celestial wonder with our Starry Night design. This design is more than just a jack-o’-lantern. It’s a magical light that shows the beauty of a starry sky.
To make your Starry Night pumpkin, you’ll need creativity and simple templates. We’ll guide you through making a stunning display. It will amaze everyone who sees it.
- Choose a smooth, round pumpkin with a clean surface
- Use creative carving patterns to map out your starry design
- Select tools like skewers, drill bits, or thin knives
The magic of this design comes from the varied hole sizes. They make the pumpkin look like a twinkling night sky. Start with a dark base, like blue or black paint. Then, punch holes of different sizes to show stars, constellations, and more.
| Hole Size | Light Effect | Design Impact |
|---|---|---|
| Pinprick | Soft twinkle | Subtle starlight |
| Medium | Gentle glow | Prominent stars |
| Large | Bright burst | Constellation highlight |
For an extra magical touch, try LED string lights or battery-operated tea lights inside. These ideas will make your pumpkin a stunning centerpiece. It will celebrate the magic of the night sky.
5. Baby Boo Pumpkin — adorable and easy for kids
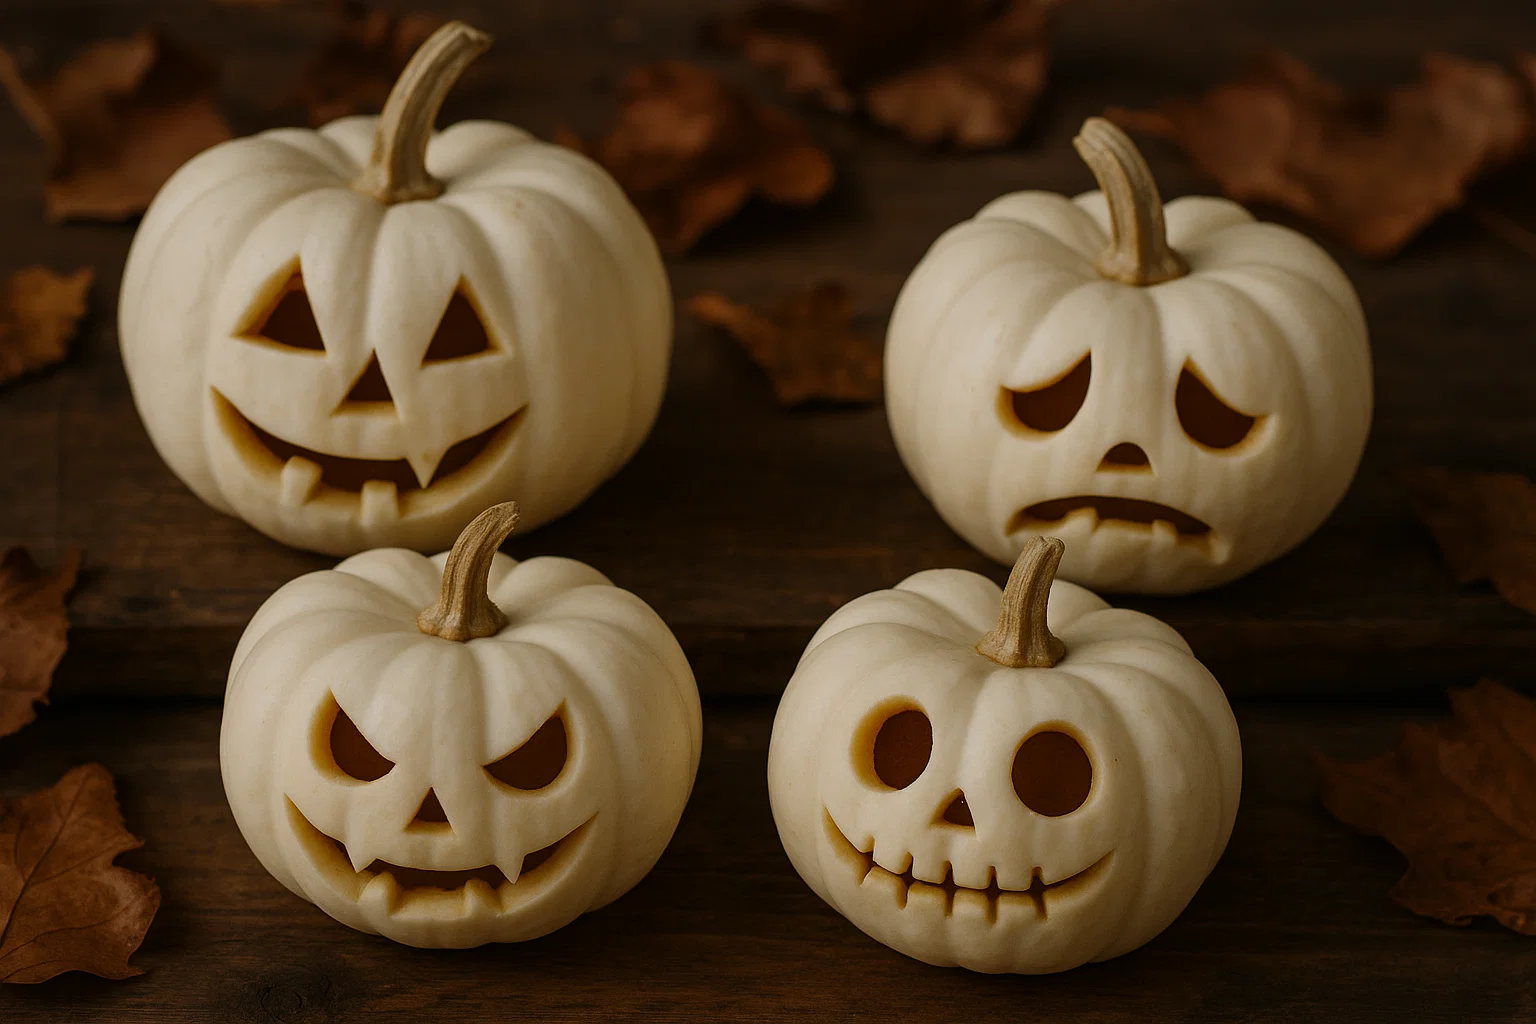
Creating a cute Halloween pumpkin is fun, not scary! Our Baby Boo Pumpkin design is great for kid-friendly carving. It brings joy and is perfect for introducing kids to Halloween crafts.
Our easy pumpkin carving patterns make it simple for kids. We’ll show you how to turn a regular pumpkin into a cute ghost. It’s a fun project for young crafters.
- Choose a medium-sized, smooth pumpkin with a flat surface
- Sketch a friendly ghost face using washable markers
- Help kids safely trace and cut large, round eyes
- Create a small surprised “O” mouth
- Optional: Add the word “BOO!” around the design
Safety is important in kids’ pumpkin crafts. Adults should watch over them to keep them safe. Use special child-safe tools for easier and safer cutting.
Let kids make their Baby Boo Pumpkin special. They can add hearts, stars, or glitter. This makes the project a fun family activity that celebrates creativity and Halloween.
Pro tip: Use battery-operated LED lights inside the pumpkin. It makes your Baby Boo Pumpkin glow safely and magically!
6. Unicorn Pumpkin — magical and Instagram-worthy
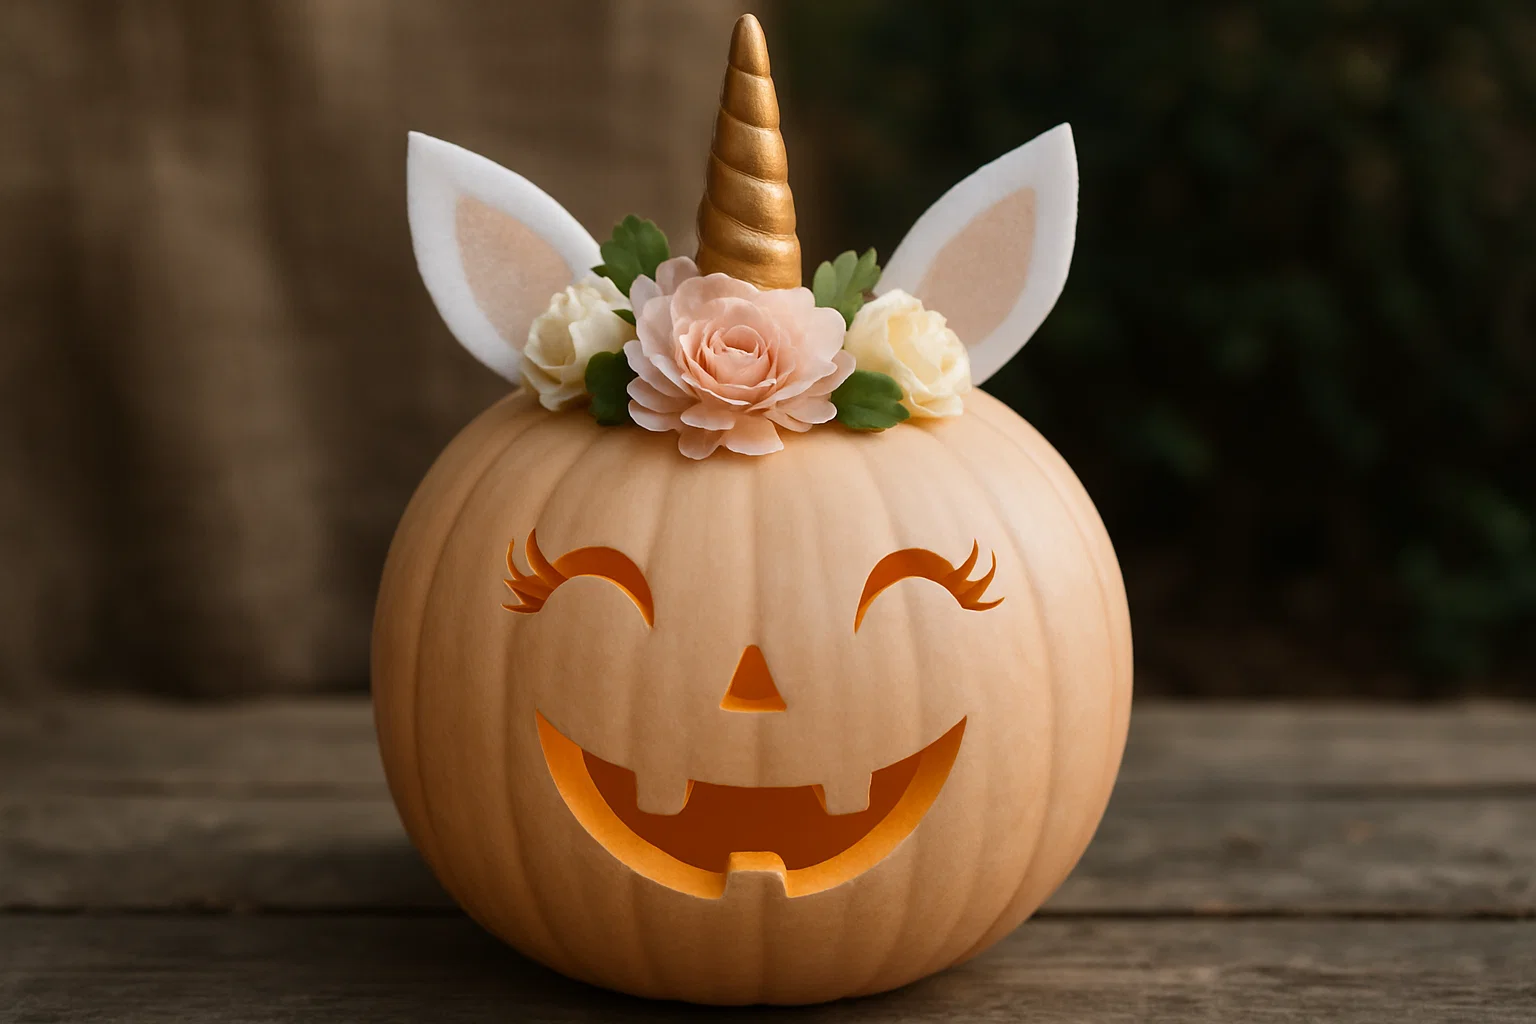
Get ready to transform your Halloween decor with the most enchanting creative jack o lanterns. They will make everyone stop and stare! Our unicorn pumpkin design brings pure magic to your seasonal decorations. It combines whimsy and Halloween fun in one adorable creation.
Crafting this magical masterpiece requires some clever pumpkin carving stencils and a dash of imagination. We’ll guide you through creating a unicorn pumpkin that’s both cute and Instagram-worthy.
- Start with a smooth, rounded pumpkin for the perfect canvas
- Choose white or pastel paint for an ethereal unicorn look
- Create delicate features using precise carving techniques
For those who prefer no-carve pumpkin ideas, you can easily transform your pumpkin using paint, glitter, and craft accessories. Pro tip: Use gold glitter for the horn and soft pastels for cheeks to capture that magical unicorn essence.
Key design elements include:
- Gentle, closed eyes with long eyelashes
- Soft, sweet smile
- Glittery golden horn
- Colorful mane using artificial flowers or ribbons
Whether you’re a Halloween enthusiast or just looking for a unique decoration, our unicorn pumpkin design promises to bring joy and wonder to your celebration!
7. Pumpkin Couple Faces — cute décor for couples or families
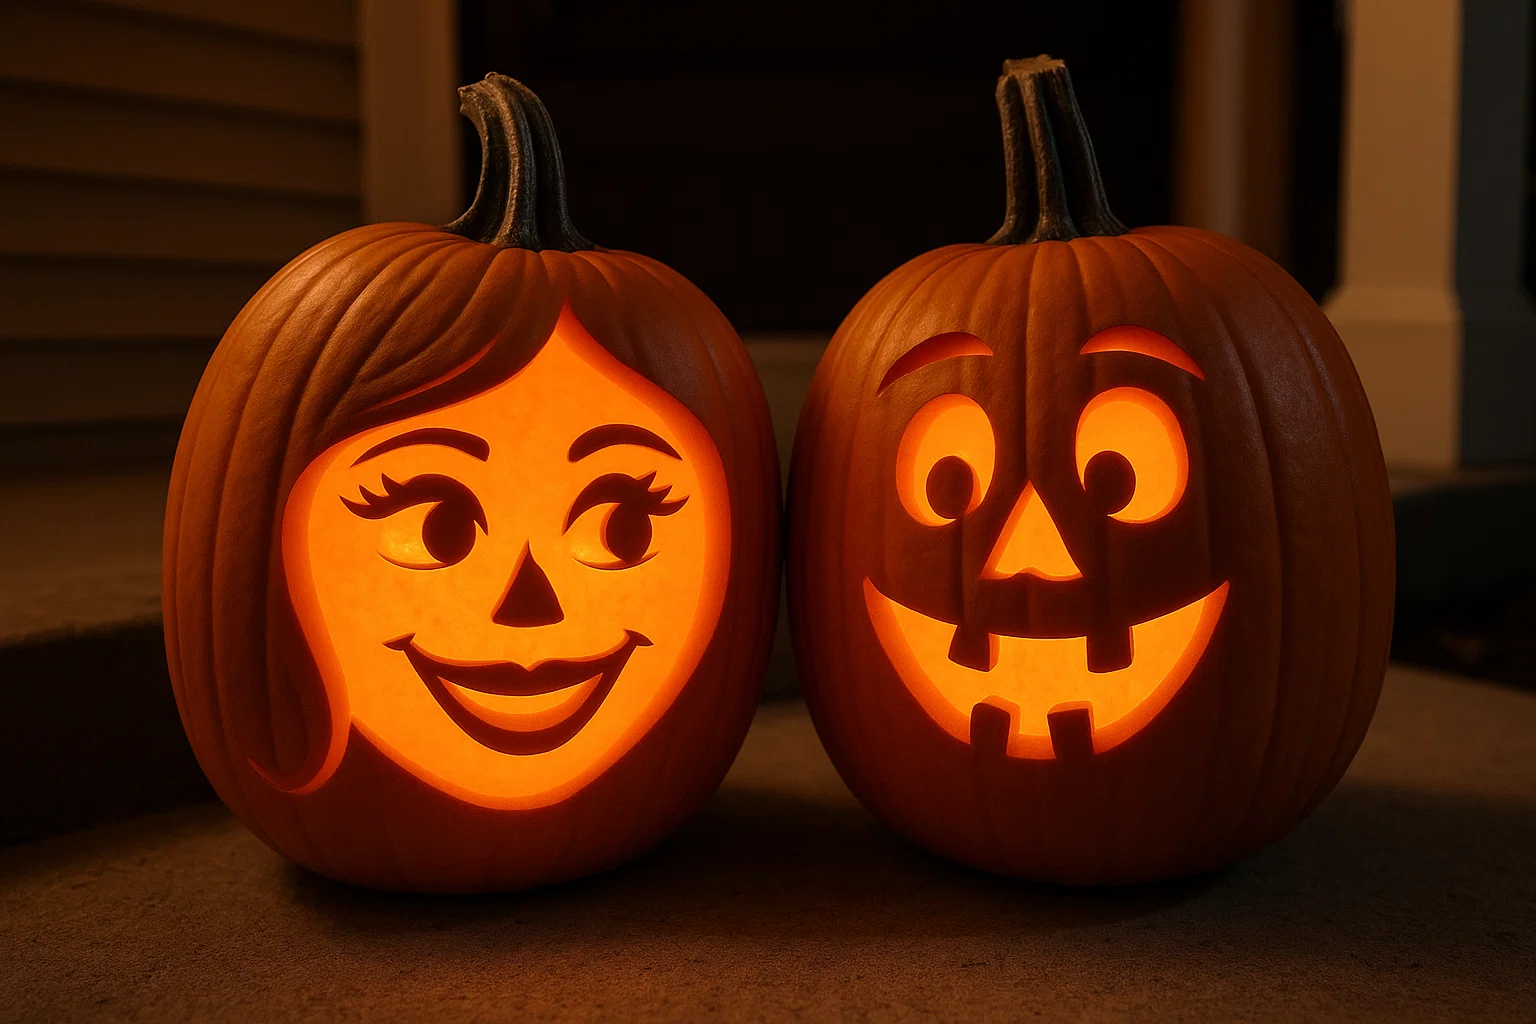
Creating a pumpkin couple is a great way to add personality and love to your pumpkin art. Our designs capture the magic of relationships with fun pumpkin expressions. They tell a unique story.
When you’re carving pumpkins, think about the personalities you want to show. Here are some fun ideas:
- Romantic couples with heart-shaped eyes
- Parent and child pumpkins with protective positioning
- Siblings with matching mischievous grins
- Best friends with complementary expressions
The secret to adorable pumpkin couples is embracing individual character. Vary the facial features – one pumpkin might have larger eyes, while the other has a gentler smile. Use different carving techniques to highlight unique personalities.
Position your pumpkins creatively to enhance their interaction. Angle them toward each other or stack them at different heights. Add playful accessories like tiny carved bow ties, mini glasses, or small hats to give each pumpkin extra charm.
Our favorite tip for family-friendly jack-o-lantern designs? Don’t aim for perfection. Embrace the natural variations in pumpkin shapes. Wonky features and unexpected details make your pumpkin couple truly special and memorable.
8. Bunny Pumpkin — pastel colors for a soft Halloween vibe
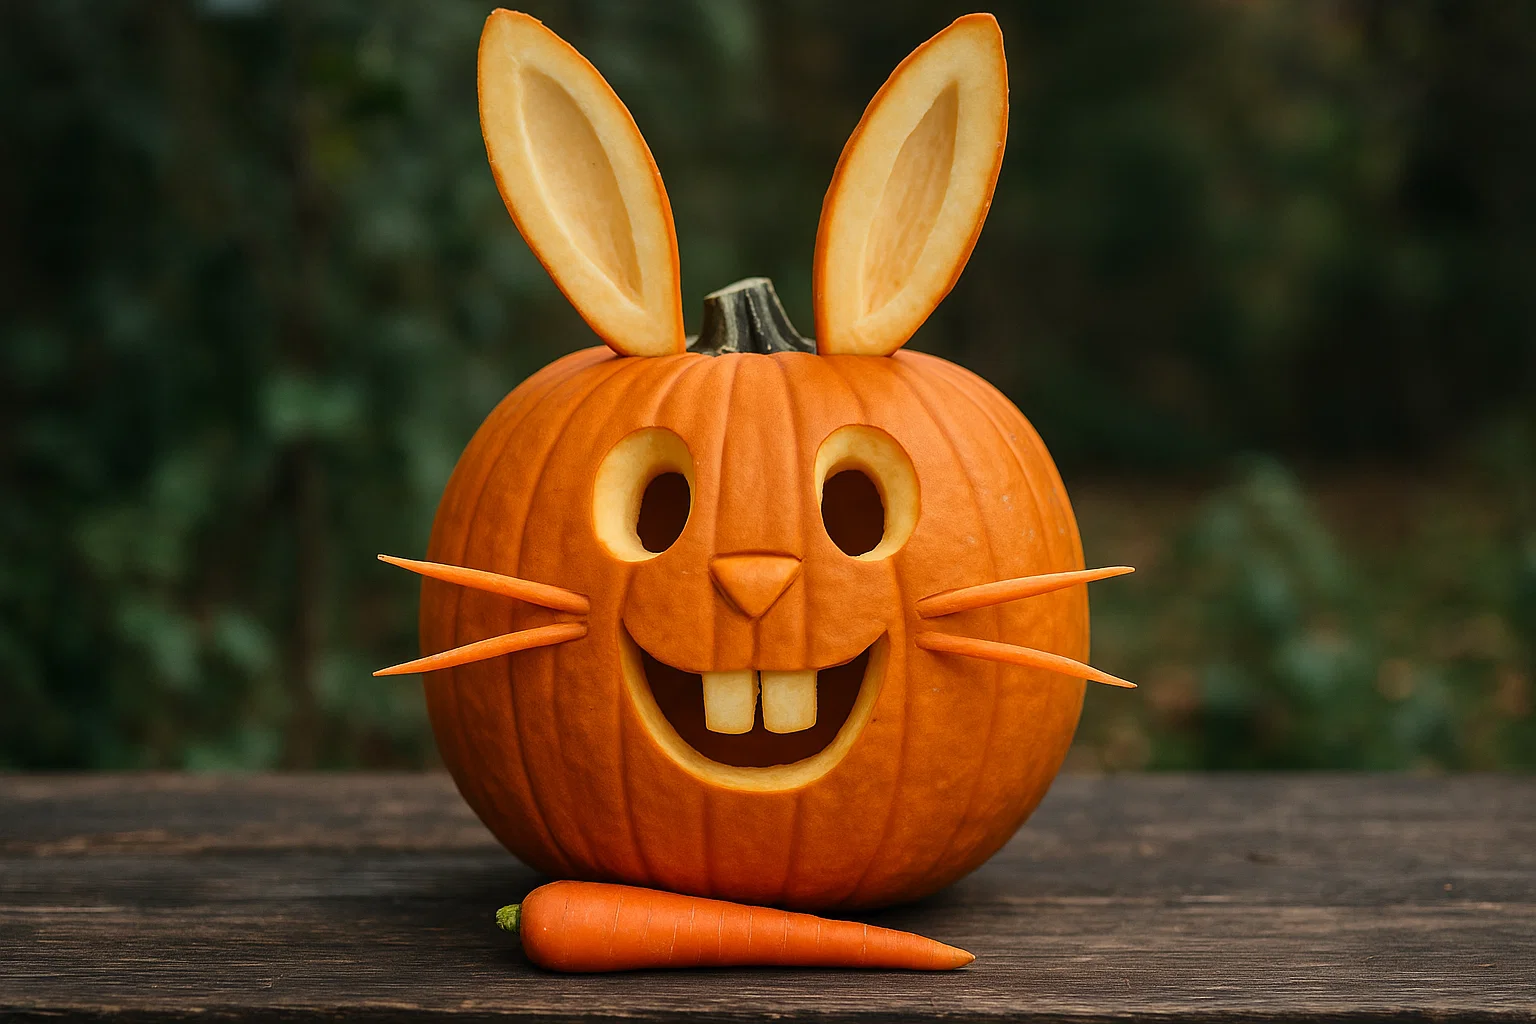
Make your Halloween decor stand out with a cute bunny pumpkin. It adds a soft touch to spooky decorations. This design is great for all crafters, especially families looking for fun and easy ideas.
Creating a bunny pumpkin is simple. Pick a smooth, round pumpkin as your canvas. Use soft pastel colors like blush pink, mint green, or lavender for a whimsical look.
- Choose a medium-sized white or pale pumpkin for the best base
- Gather acrylic paints in pastel shades
- Collect craft materials like cotton balls, googly eyes, and ribbon
To make your bunny come to life, try these creative steps:
- Paint the entire pumpkin in a soft pastel color
- Cut ear shapes from foam or cardstock and attach them
- Use cotton balls to create a fluffy tail
- Add whiskers with thin paintbrush strokes
- Finish with a cute ribbon between the ears
Our bunny pumpkin design is a charming alternative to traditional Halloween decorations. It’s cute, approachable, and will make everyone happy at Halloween parties!
9. Smiley Ghost Pumpkin — spooky but sweet
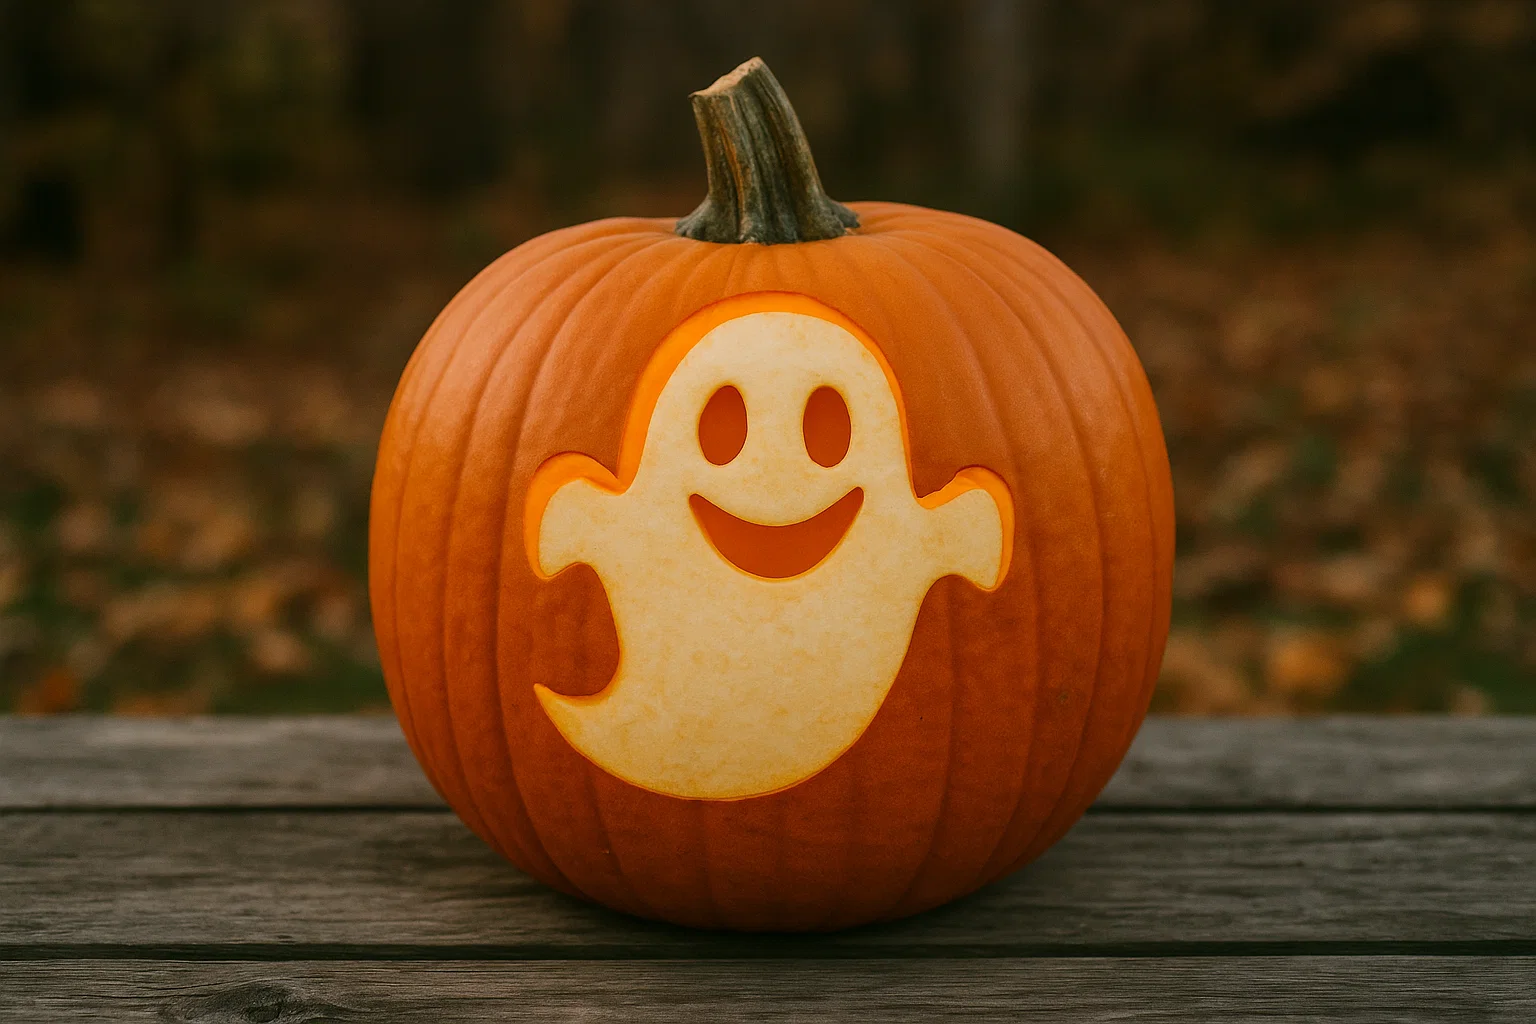
Make your Halloween decorations stand out with a fun twist on the classic ghost pumpkin! Our smiley ghost design adds a playful touch to spooky pumpkin faces. It will delight both kids and adults.
Creating easy pumpkin faces is more fun with a friendly ghost design. We’ll show you how to make a ghost pumpkin that’s cute, not scary.
- Choose a smooth, round white or light-colored pumpkin
- Sketch a gentle, flowing ghost outline
- Carve a wide, welcoming smile
- Add large, expressive cartoon-style eyes
The key to a great ghost pumpkin is mixing spookiness with sweetness. Our design uses soft carving techniques. This creates depth and dimension without being scary.
| Carving Difficulty | Skill Level | Time Required |
|---|---|---|
| Easy | Beginner | 30-45 minutes |
Pro tip: Use a small scraping tool for layered effects. This makes your ghost look ethereal and light. Soft, wispy edges will add a magical touch to your pumpkin. It’s perfect for a cute and festive Halloween!
10. Cupcake Pumpkin — perfect blend of cute and creative
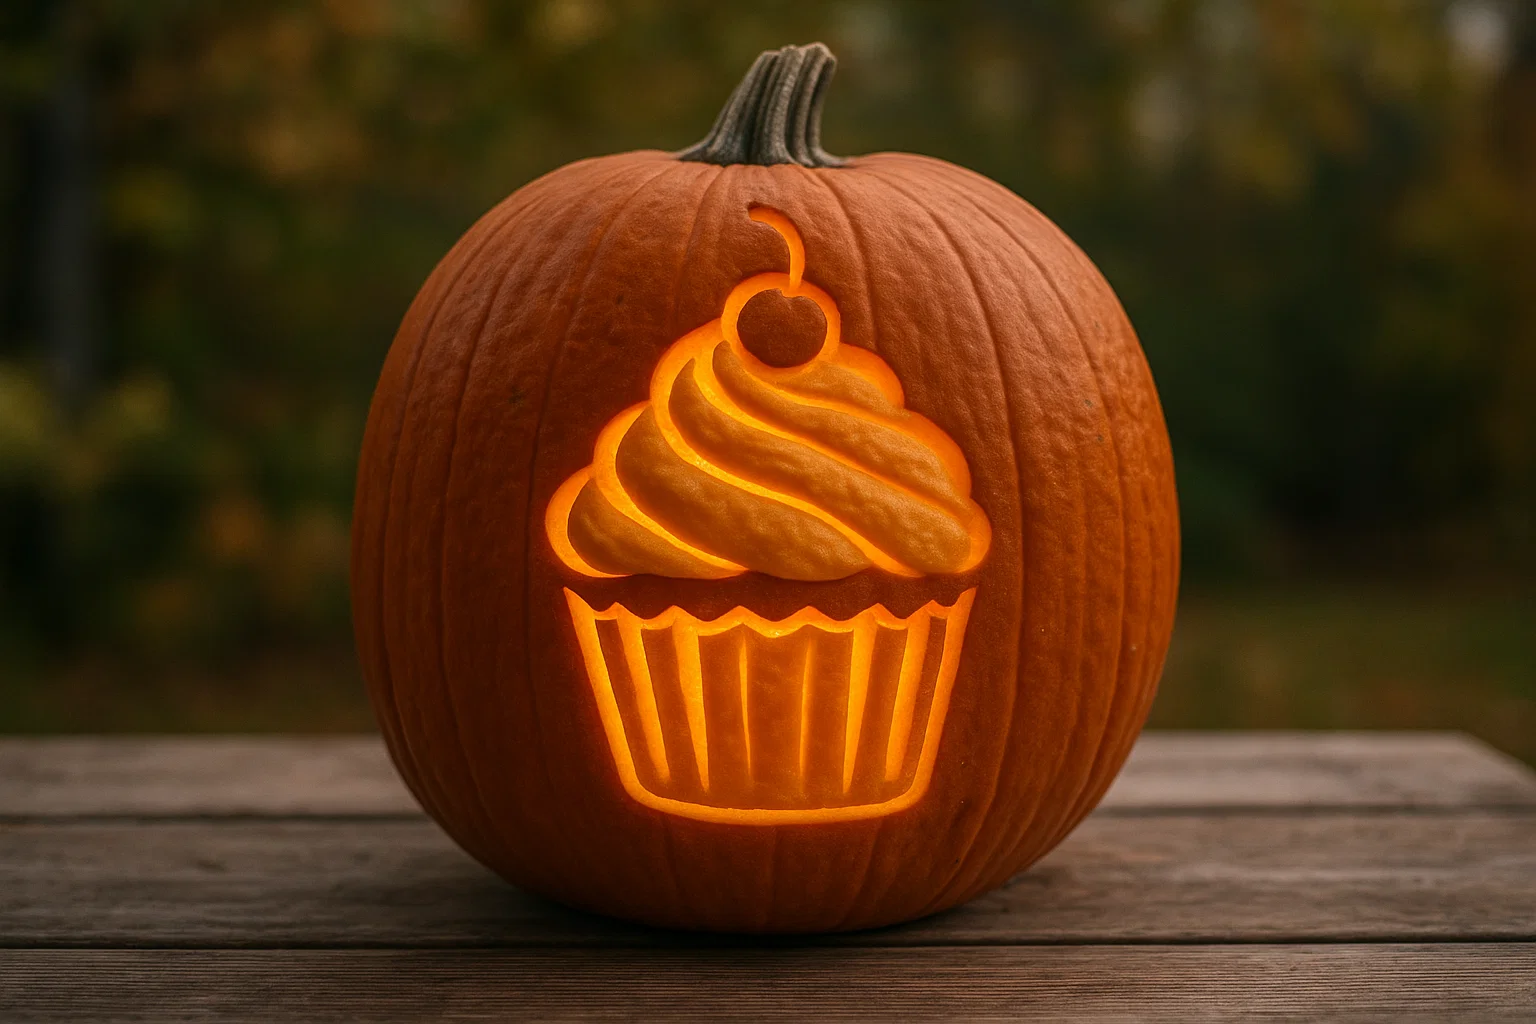
Turn your pumpkin into a dessert-themed masterpiece for Halloween. Our cupcake pumpkin design is a fun twist on pumpkin carving. It’s easy to do and looks great.
To make this design, you’ll need a few things:
- Acrylic paint in pastel or frosting colors
- Paintbrushes
- Glitter (optional)
- Foam or craft paper for decorations
Use no-carve pumpkin decorations for this project. It’s great for families with kids. Paint the bottom two-thirds of your pumpkin like a cupcake wrapper. Use vertical stripes or soft colors.
The top part is your “frosting.” Paint it white or pastel with swirly textures. This looks like soft icing.
Add extra details to make it special. Paint the stem red like a cherry. Or, attach a small foam cherry. Sprinkle glitter for “sprinkles” or use tiny buttons as candy decorations.
Pro tip: Make a bunch of cupcake pumpkins in different sizes and flavors. They’ll make your Halloween display amazing and fun for everyone!
🪄 Easy DIY Techniques to Make Your Pumpkin Designs Stand Out
Make your Halloween decorations pop with advanced pumpkin carving skills. We’ll show you how to turn simple jack-o-lanterns into stunning art. You’ll learn creative methods to make your mini pumpkin carvings stand out, no matter your skill level.
Paint + Carve Combo: Adding Depth and Color
Our top pick for amazing pumpkin designs is the paint-and-carve method. Begin with a base color like white, black, or metallic. Carving through the paint reveals the orange inside, creating stunning contrast and depth.
- Choose unexpected color palettes
- Use washable chalk markers for precise designs
- Experiment with metallic or pastel paint finishes
Stencils and Patterns: Your Secret Weapon
Stencils make creating jack-o-lantern patterns easy. Use linocut tools or Dremel tools for detailed carvings. These remove only the outer skin, leaving beautiful relief designs.
Accessories and Lighting: The Final Touch
Take your pumpkin to the next level with fun accessories:
- Googly eyes for instant personality
- Fabric bows for feminine charm
- Glitter for magical sparkle
- LED fairy lights for safe, long-lasting glow
Pro tip: Replace candles with LED tea lights for a safer, brighter glow. It brings your carved masterpiece to life!
🧤 Kid-Friendly Pumpkin Carving Ideas & Safety Tips
Decorating pumpkins is a fun family tradition for Halloween. It’s all about safety and fun for kids. Our guide will show you how to make pumpkin art that’s both safe and exciting.
No-Carve Pumpkin Decorating for Little Hands
Not all kids are ready for carving. But they can still have fun with pumpkin crafts! Here are some safe ideas:
- Paint pumpkins with washable tempera paints
- Use sticker faces and decals
- Draw designs with washable markers
- Wrap pumpkins with colorful yarn
- Attach foam shapes with child-safe glue
Safe Carving Tools and Supervision Tips
When kids are ready to carve, choose the right tools and follow safety rules:
| Age Group | Recommended Tools | Supervision Level |
|---|---|---|
| 3-5 years | Stickers, Paint | Constant direct supervision |
| 6-8 years | Plastic pumpkin saws | Close adult guidance |
| 9-12 years | Child-safe carving kit | Supervised participation |
Fun Family Carving Night Activities
Make pumpkin decorating a special family night with these ideas:
- Host a pumpkin decorating competition
- Create themed pumpkin challenges
- Collaborate on a family masterpiece
- Take photos to capture memories
The best part of pumpkin crafting is the time spent together. Focus on safety, creativity, and making memories that last!
🎨 Creative Alternatives: Paint, Stickers, and More!
Forget traditional carving! We’re exploring no-carve pumpkin decorating that’s safe, fun, and adorable. These creative alternatives will make your Halloween decor pop without the mess and safety risks of sharp tools.
Pumpkin decorating doesn’t have to be hard. Simple techniques make anyone a Halloween master.
Painted Pumpkins: Zero-Mess Creativity
Acrylic paints unlock a world of no-carve pumpkin designs. Try these fun techniques:
- Solid color base coats
- Ombre gradient effects
- Metallic spray paint finishes
- Constellation-inspired patterns
Sticker Magic: Quick and Easy Decoration
Stickers add instant personality to pumpkins with little effort. They’re great for quick decorating.
| Sticker Type | Difficulty Level | Estimated Time |
|---|---|---|
| Pre-made Face Sets | Easy | 5-10 minutes |
| Custom Vinyl Decals | Moderate | 15-20 minutes |
| Handmade Sticker Designs | Advanced | 30-45 minutes |
Markers and Washi Tape: Unique Texture Techniques
Use permanent markers, paint pens, and washi tape for unique textures and patterns. These tools create intricate designs without cutting.
Our no-carve pumpkin decorating methods let everyone enjoy Halloween, no matter their age or skill!
🌟 Expert Tips to Keep Your Pumpkin Fresh Longer
Keeping your Halloween pumpkin looking great needs some smart care. Whether it’s a small pumpkin art or animal designs, these tips will keep it fresh. They’ll help your pumpkin stay bright and lively all through Halloween.
Stopping decay starts with knowing how pumpkins spoil. Moisture, bacteria, and temperature are key. They decide how fast your carved pumpkin will fade.
Natural Preservation Strategies
- Create a protective vinegar spray mixture:
- Equal parts white vinegar and water
- Mist carved surfaces daily
- Seal moisture with petroleum jelly on carved edges
- Soak pumpkins in bleach solution before carving
- Store in cool environments (50-60°F)
Indoor vs. Outdoor Display Considerations
| Location | Best Practices | Preservation Tips |
|---|---|---|
| Indoor | Use battery-operated lights | Place on waterproof trays |
| Outdoor | Choose shaded areas | Protect from extreme weather |
We aim to help you keep your pumpkin designs looking fresh and perfect for Instagram. With these tips, your Halloween pumpkin will stay beautiful all season.
Reviving Wilted Pumpkins
Pro tip: Submerge slightly wilted pumpkins in cold water for several hours. This will help them regain their original shape and firmness.
📸 Show Off Your Pumpkin: Social Media & Sharing Ideas
Crafting adorable pumpkins is just the start of Halloween fun. We’re excited to help you show off your cool pumpkin designs on social media. Whether you’re great at easy pumpkin carving or have a knack for funny designs, sharing your work can inspire others. It also connects you with a community of Halloween fans.
Getting the perfect pumpkin photo takes some planning. Shoot during golden hour for warm, soft light that shows off details. Try different angles, like looking down on your pumpkin, to capture its full charm. Use backgrounds like autumn leaves or rustic wood to make your pumpkin stand out.
Instagram and TikTok are great for sharing your Halloween art. Use hashtags like #pumpkincarving and #halloweendecor to reach more people. Write fun captions that share the story behind your design. This makes your post more memorable and likely to be shared.
Look for online Halloween carving contests from craft brands and magazines. These contests are a chance to show off your skills, win prizes, and meet other pumpkin artists. Most importantly, have fun and let your creativity shine during the spooky season.